Securing your Azure SQL DB using Azure Private Link
 Whenever you create a new SQL Database on the Azure Cloud, one of the first things you probably do is set the ‘Allow Azure services and resources to access this server’-switch to ‘Yes’. This allows your App Service for example to access your database. It’s not very secure however since all an attacker then needs is your connections string. And although you are probably very careful with that, it might just accidentally get public. It’s therefor best practice to add another layer of security. One of the options to do that, which recently went GA, is called Azure Private Link. In this post I’ll show you how to securely access you db from an Azure Web Service.
Azure Private Link
Private Link is a relatively new service which is available on quite a lot of Azure services. When you use private Link, your SQL DB is injected into your virtual network and gets a private IP address. Resources in your virtual network can talk to this DB over the private IP, which means that you can restrict access to your SQL DB to only your Virtual network, making the ingress private.
Private Link supports access over global vNet peering, VPN and ExpressRoute.
Setting up the resources
I expect that you are familiar with Azure and therefor expect you to create the following resources on your own:
- Azure App Service
- I created a Windows version with Net Core
- You need at least the Standard Tier
- Azure SQL DB with the Sample db loaded
- I picked the S0 to keep costs low
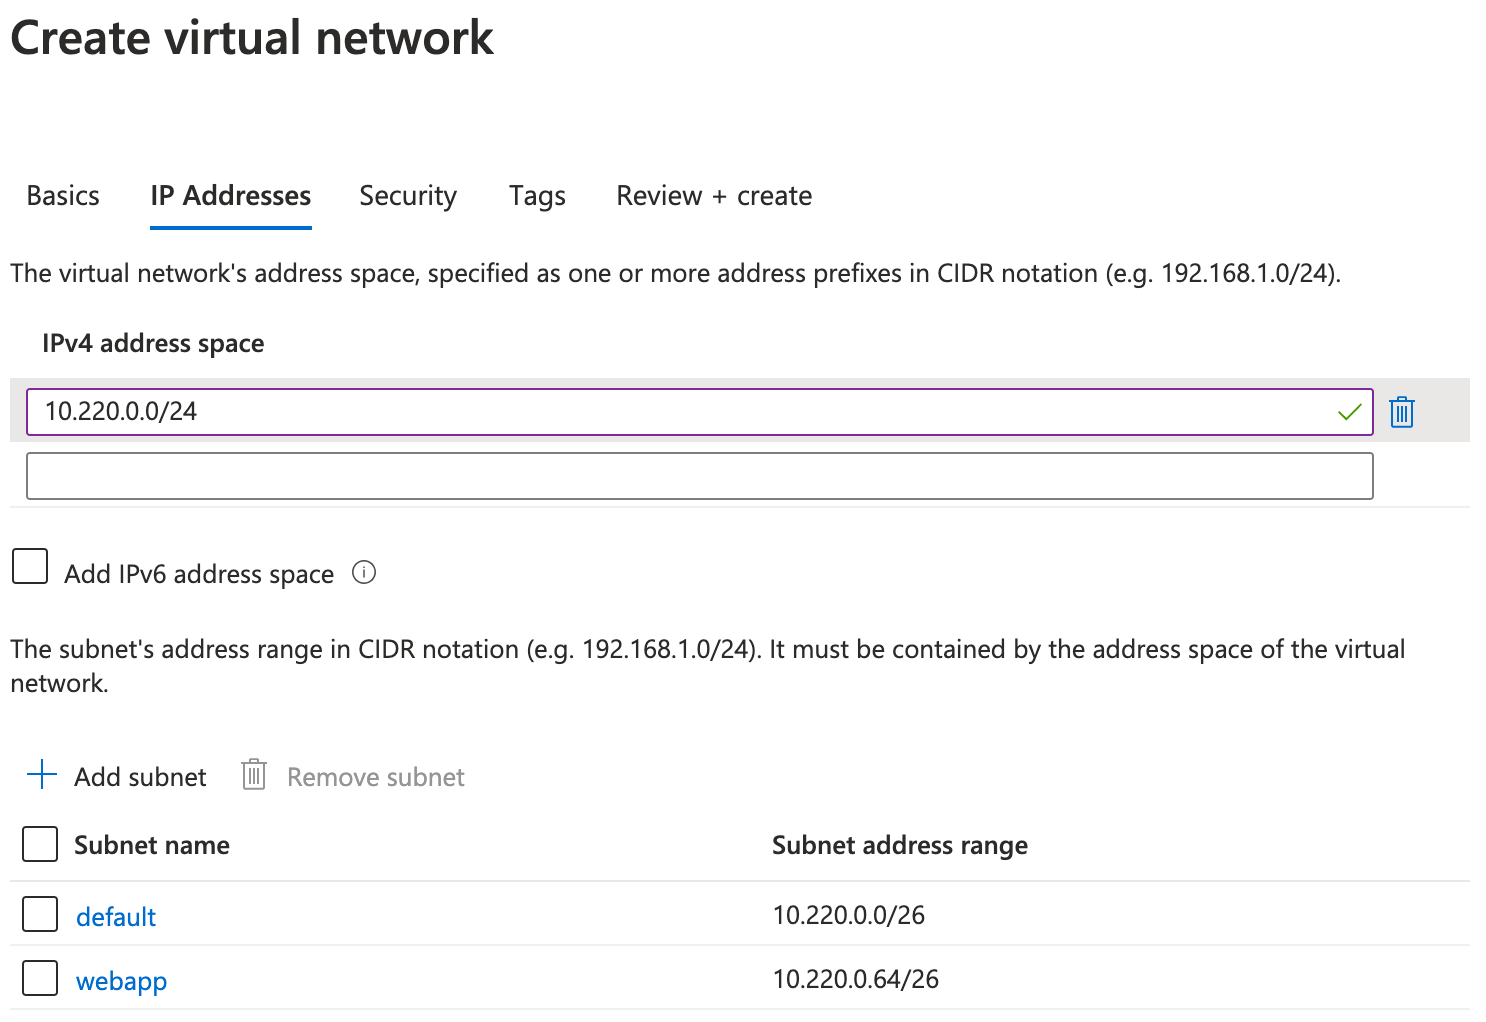
The first resource we are going to create is a new Virtual Network. I’ve created one with a ‘10.220.0.0/24’ address space and two subnets. I’ve added two subnets since one of them will be delegated the the App Service later on and therefor cannot be used by anything else. Other then the ip-addresses I left everything to their default values.
The next step is to connect our App Service to this VNet and to be precise to one of the subnets in it. Navigate to the App Service and click on ‘Networking’. The first option is the one we need, ‘VNet Integration’. Select the VNet and the ‘webapp’ subnet you just created and click Ok. If you now navigate to the ‘webapp’-subnet you will see that Subnet Delegation has been enabled for this one.

A few interesting notes on this ‘Regional VNet Integration’ that we just used. VNet Integration works by mounting a network interface into your subnet. That means that traffic that flows through your VNet will have a from address from your VNet and can use that to access other services in your VNet. This by default only applies to private destination addresses meaning the addresses specified in RFC 1918. All other traffic will follow the normal routes and therefor uses the ip addresses you can find in the properties section of the App Service. You can change that behavior by setting WEBSITE_VNET_ROUTE_ALL to 1 in the App Service Configuration. That will force all traffic to go through the VNet.
Azure SQL Database
Now we need to add the actual Private Link to SQL. Find your SQL server in the Azure portal and navigate to the ‘Private endpoint connections’ blade. In the second step of the wizard your going to set the resource. Select ‘Microsoft.SQL/Server’ as the ‘Resource Type’ and select your server from the drop down. In the third step make sure you select the ‘default’ subnet and keep ‘Integrate with private DNS zone’ On. Navigate to the just create private link and see that it got an ip in your subnet. 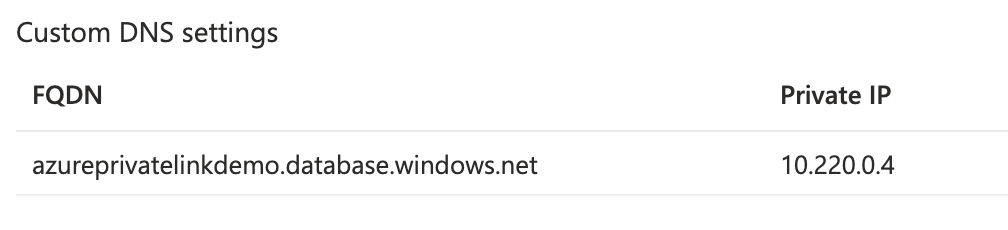 You will also find this private link as ‘Connected Device’ on your virtual network.
Let’s see the connection in action
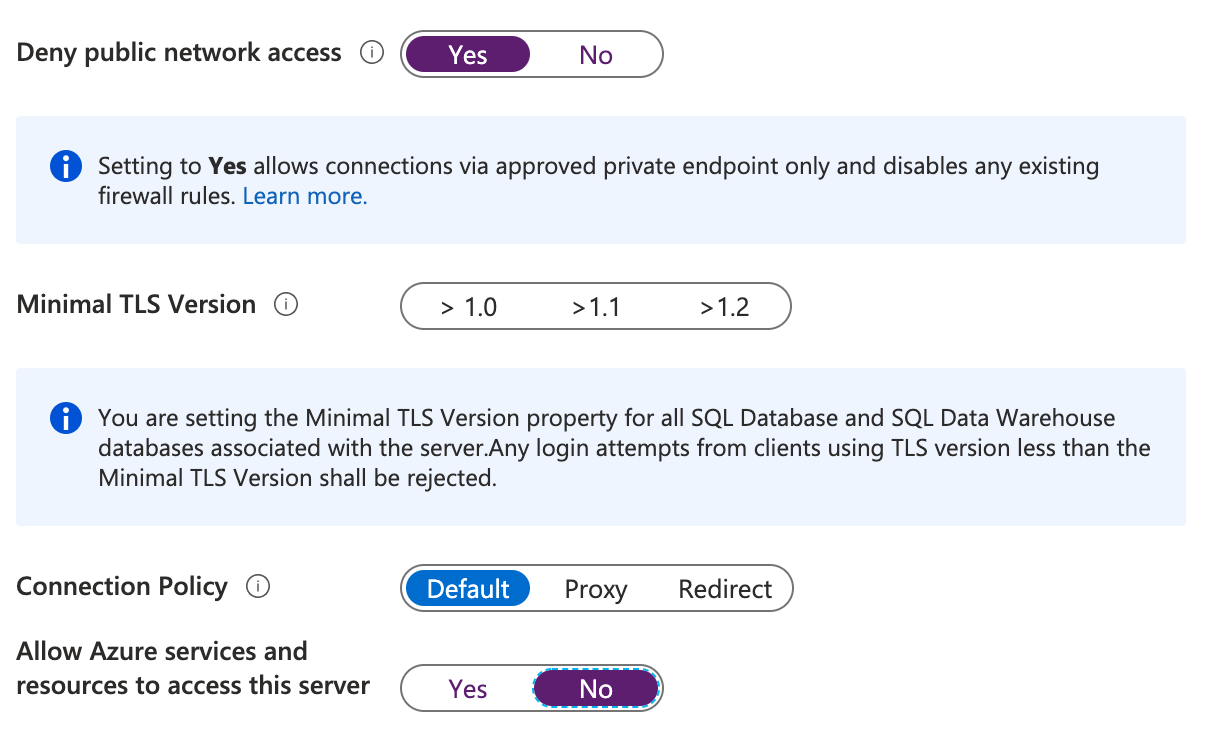
Time to see the private link in action! Head back to your SQL Server and open the ‘Firewalls and virtual networks’ blade. Here we’re going to set the ‘Deny public network access’-switch to ‘Yes’ and the ‘Allow Azure services and resources to access this server’-switch to ‘No’. We’ve now locked-down our SQL server to just our Private Link!
One last setting we need to make on our App Service. Navigate to it and open the ‘Configuration’ blade. We’re going to add to App Settings here:
- WEBSITE_DNS_SERVER with value 168.63.129.16
- WEBSITE_VNET_ROUTE_ALL with value 1
We already discussed the second one. The fist one is about which DNS server to use. By default, your app won’t work with Azure DNS Private Zones. To work with Azure DNS Private Zones, which we added while creating the Private Link, we need that setting.
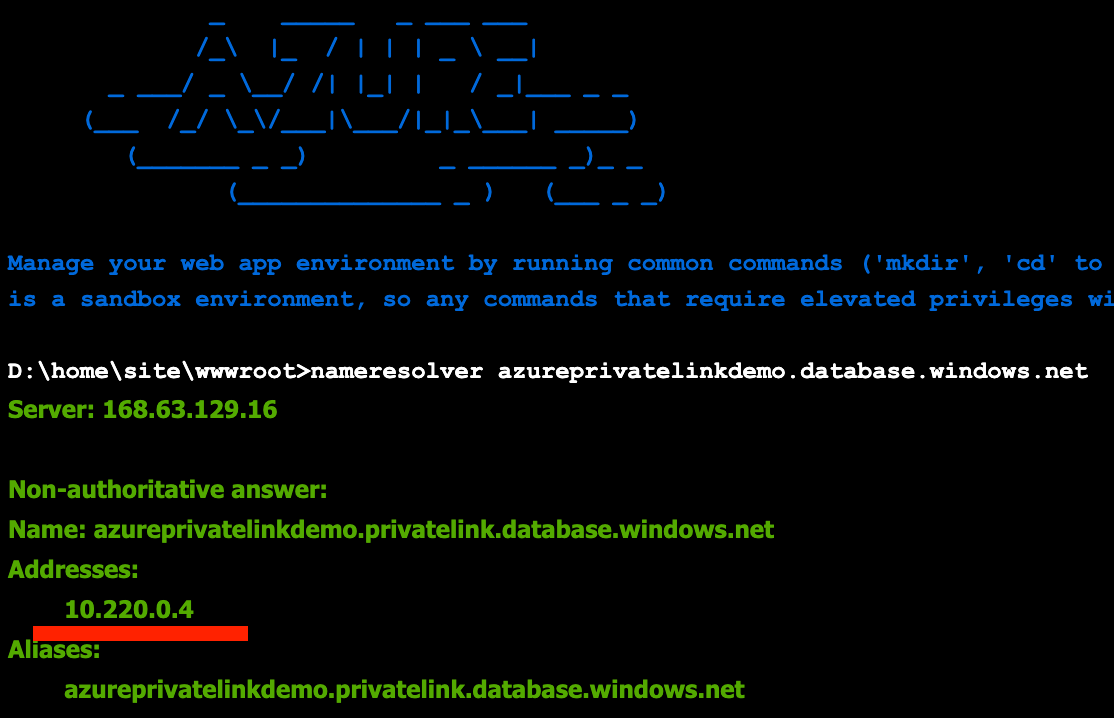
Now, to actually see the address our App Service uses to connect to our database we’re going to use the good old nameresolver.exe. Open the console on the App Service and run the command:
nameresolver azureprivatelinkdemo.database.windows.net
It should give you similar output to this and show you a private IP coming from your VNet:
A last note: if you now want to connect to your DB from your app you can just use the connection string like you are used to. The Private DNS Zone that was added will make sure that the correct IP get’s resolved.